Blogs are an important part of any functioning website. That’s why WordPress makes adding a blog to your already high-performing website super simple and is popular for its website blog capabilities. Today is a tell all, about WordPress Posts Page. When you create a fresh WordPress install, your posts will appear on the home screen, by default. However, if you want to have a separate space for your posts, you can create a WordPress posts page.
The difference between WordPress posts and pages
WordPress Posts
A WordPress posts page contains time-specific content. These posts are the website's life as they keep it active, relevant, and keeps your audience interested. Originally, posts are listed on your website's home page in reverse chronological order. You can organise your posts using categories and tags. Categories and tags help link all your related posts. Your WordPress posts page also creates an RSS (Really Simple Syndication) feed for your posts, making it easier for your website subscribers to have your posts fed to them directly. RSS feeds also make it easier for people to share your posts, which helps to direct traffic to your website.
WordPress Pages
While WordPress pages may seem identical to a WordPress Posts Page, once you begin to use them, you’ll realise the differences. A WordPress page is not organised by date and you also cannot organise it into categories or tags. Additionally, unlike Posts, Pages cannot be archived. What you can do is organise WordPress pages hierarchically or by menus depending on your preferences. Another important factor to note is that Pages are excluded from your RSS feeds. If you want the content on your page to show up in RSS feeds, you have to publish it as a post instead.
Why you need a WordPress Posts Page
If you are interested in content marketing. What does this mean? Well, if you have a blog or other post-worthy content, having a posts page makes sense. As discussed earlier, the posts page is engaging and keeps customers and site visitors up to date with new plans, programmes and offers your company has. Creating a separate WordPress Posts page allows creates a central location for all your content so that visitors don't have to search the entire website for the specific information they may be looking for. This reduces clutter, making everything more reader-friendly and easy to navigate. A WordPress Posts Page is also customisable. With several templates available for you to choose from, select the one you prefer and it won't compromise your page's original theme. Having a Posts page also helps to improve your website's SEO (search engine optimisation). In addition to this, your audience can use the categories and tags to make finding their desired content super simple. With a separate Posts page, you can use your website's home page to facilitate vibrant and effective Call To Actions (CTA).
Create your WordPress Posts Page in 3 steps
As said earlier some of the benefits to having a dedicated posts page are to keep your home page free from clutter which leaves your home page clear and perfect to make the best first impression. Are you ready to create a WordPress Posts Page? If yes, let's get started.
Step 1 – Create the pages
We'll start by creating 2 pages, if you do not have any, to begin with.
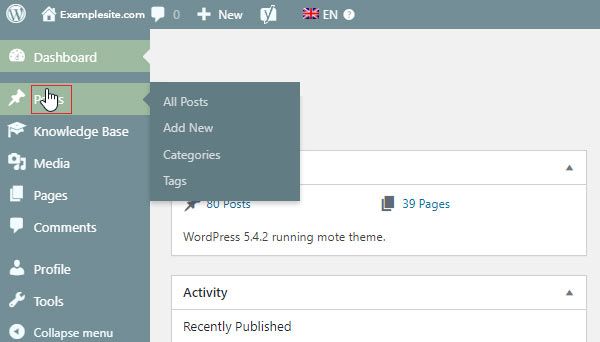
- Head to the Pages section and select add new. One page will be your home page, and the other will be your posts page, so name them accordingly.
- If there is an appropriate template there that you like, you can also add it to either one or both pages.
- Now press the publish button. Please note that there is no need to populate the posts page with anything immediately because that is where you will post all your timely content.
Step 2 – Add and display new content on your posts page
It is now time to direct all new and present content to your newly created WordPress Posts Page.
- Go to settings and click on the option Reading. It will then take you to a page that has all the homepage display options. You will notice that by default, all your latest posts are directed to the homepage and all new updates appear there as well.
- You will need to make your homepage static, so click on the option that says A static Page. This will make your homepage static.
- Now make other adjustments, such as the number of posts that will appear on the page at a time or select a snippet of each. Now click save changes when you are through adjusting everything to your liking. It’s also wise to add your posts page to your website's navigational menu. This helps your audience to easily navigate and find your content faster.
Step 3 – Adding your Posts page to your website's Menu
Finally, you are ready to add your Posts page to your navigation menu. Users are familiar with having a website menu, so naturally, if they need a quick and easy way to find all your website's posts, they will use the menu options they have available to them.
- Click on Appearance, then search for Customise screen you will then see an option for the menu's tab.
- Select what is relevant to you and click the Add item button. Open the pages according to their menu, find your posts page, and click Add to menu.
- Click Publish, and you're done.
Wrapping up
So there you have it, go ahead and create your own WordPress Posts page in 3 easy steps. If you're looking for private web hosting services, you are in the right place. We have awesome reliable WordPress web hosting packages for you to choose from.


